
What is FeedOtter?
Pros
-
“I’m extremely happy with the product and would definitely recommend the service to other marketing automation users.”
-
“The documentation is great and I used that to easily set up a new feed specifically for this program so we can pick the best blogs to include.”
-
“Great tool to create routine emails in minutes.”
-
“FeedOtter is super handy and the team behind it is willing to help with everything.”
Cons
-
“We had HTML and CSS experts working on it for days and there is no easy way to go into the code to make changes. I was dumbfounded how little this produce does.”
-
“FeedOtter has virtually no functionality besides pulling in text from the blog, inserting a logo and then sending.”
-
“Some limitation in the templates but mostly because of limits to the RSS itself.”
-
“It can be hard to use at first, but then it get’s simple.”
| Founder Name | Andy Theimer |
| Established Date | 2016 |
| Country | United States |
| Platform | Cloud, SaaS, Web |
| Support | |
| Demo and Training | Live Online, Documentation |
| Category | Email Marketing Software |
Rating
- Capterra – 4.8 by 37 people
- G2crowd – 4.5 by 8 people
- GetApp – 4.8 by 37 people
Features
| Drip Campaigns | Dynamic Content | Event-Triggered Email |
| WYSIWYG Email Editor | Social Marketing | Adaptive Scheduling Supports |
Sign up Process
For signup, you just need to verify your email.
Pricing
Free Trial – With its free trial, you can explore its features.
- FeedOtter has not provided pricing information for this product or service. To know the pricing, contact the vendor.
Pros |
Cons |
|
|
Clients
Conga, NEXXT, Rubicon, APS, smarsh
What is the FeedOtter RSS Feed Ingtegration?
Automate RSS, blog, and news content emails with Net-Results and FeedOtter.
FeedOtter pulls new content from your website, blog, and other sources and creates great looking emails directly in Net-Results!
- Automatically create and launch Campaigns with hourly, daily, weekly, monthly, every-other, and business day sending patterns
- Choose from great looking templates
- Intelligent content analysis automatically skips sending if there is no new content available
- Combine multiple RSS and data feeds (XML, JSON) into a single email. You can even pull in content from Facebook, Instagram and Twitter!
- Your emails are launched as a Net-Results Campaign – with full reporting and dashboards
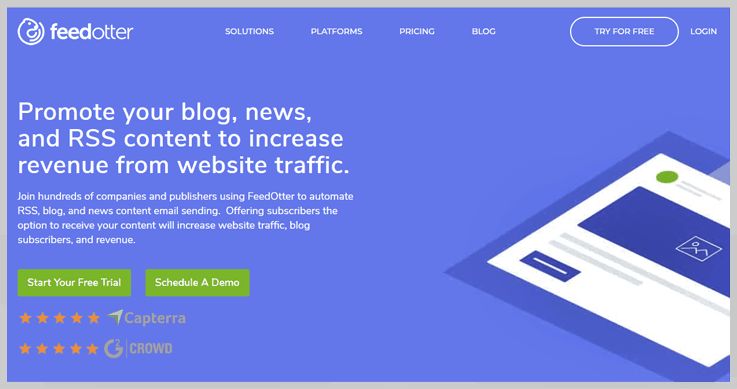
Promote your blog, news, and RSS content to increase revenue from website traffic. Save hours of time on email & campaign creation!
A FeedOtter subscription is required. View pricing, or learn more about FeedOtter’s integration with Net-Results.
How to Set Up The Integration
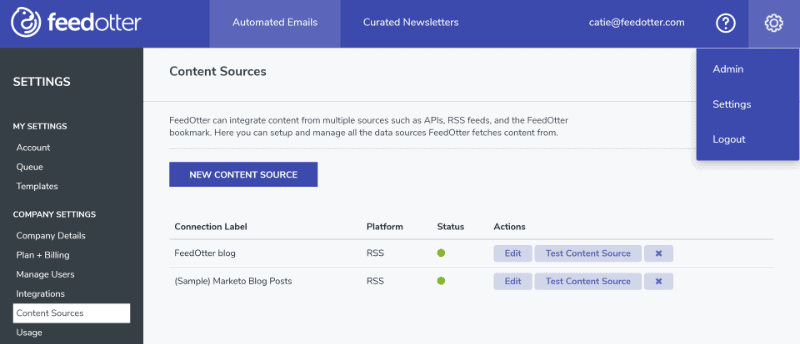
FeedOtter Account
In order to leverage this great integration, you will need a FeedOtter account. FeedOtter offers a free trial – so if you want to check it out before committing you can do that!
Creating an RSS Feed Campaign
Once you have your FeedOtter account, you can start creating your first campaign! To do so, you’ll want to select New Automated Email in the upper left-hand corner when logged in to FeedOtter and then name your campaign, like the below:

You’ll notice on the page where you named your campaign that you have two options for a “Campaign Type”
- Scheduled Recurring RSS/Blog Email
- Based on your defined schedule FeedOtter will create and schedule emails that contain content from one or more RSS feeds. Clients use this to automate blog digests, newsletters, employee newsletters, and more!
- Automated Alert/Notification Email
- An automated email is sent when new content is found in an RSS feed. Customers use this option to automate new blog post, system status, new jobs, and breaking news alert emails.
Once you name your campaign and choose your campaign type, it’s time to choose your schedule & add your RSS Feed. Scheduling is where you can dictate how many posts you would like to send, whether you’d like to only send emails when there is new content on your feed, and how often you’d like to send out the emails.
In the example below, we are going to send 4 posts every week on Tuesdays at 2:00 PM using the Net-Results blog.

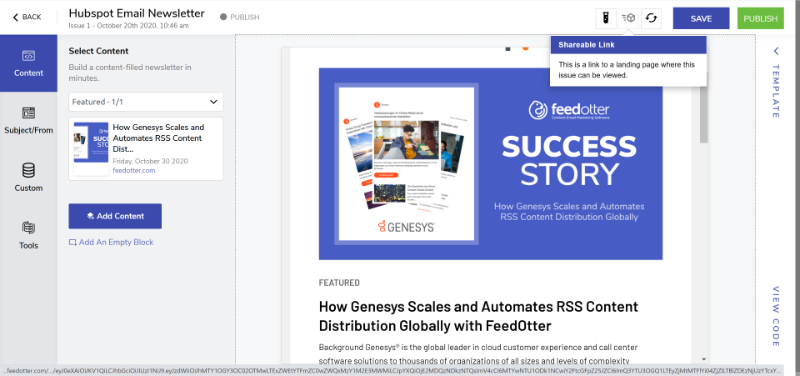
Once you have your RSS Feed Validated, you now get to have some fun and customize your email. FeedOtter provides many great templates that allow you to make tweaks to colors so you can stay on brand, add personal messages at the top, add logo files, and more!
FeedOtter also makes it easy to add a Footer to your email. Simply select the “Address, Social, UTM, and Advanced” button at the bottom of the left-hand menu. The below will appear:

Enter your company’s address, social links, UTM codes, and configure your notifications!
At the top of your email, enter the From & Reply-To Address. Something to note is that the subject line of your email will automatically populate with the Campaign Name – you can change this manually right below the From Address if you’d like!

If you’d like to see what your email will look like before you publish to Net-Results, you can select the “Proof” button at the top right corner of the email.

If you like the look of your email after testing – it’s time to publish to Net-Results! Simply select the green button at the top right corner next to the “Proof” button to get started.
On the next page, you will be prompted to Add a Net-Results Connection.

Select that button and follow the prompts. If you are logged in to Net-Results in another window you should automatically get directed to the page below, if you are not currently logged in, you will be prompted to log in to your Net-Results account & then directed to the page below.
Note, if you get to this step and you are unable to see this page in Net-Results, your user most likely does not have the proper permissions. Follow the instructions found on this page to check what permissions your user has & modify them if necessary.

When you select “Authorize” your page will be redirected back to FeedOtter. On this page is where you can manage what contacts are going to participate in the campaign you are sending out.
This integration allows you to leverage any Net-Results Lists or Net-Results Subscriptions in your account. You can also choose to select a “review period” which will allow you to create the email and campaign in Net-Results – but buys you time should you want to check out the email in Net-Results before sending it out.
Select “Save Settings and Start Campaign” and you’re done! Within your Net-Results account, there will be a new campaign on the My Campaigns page, as well as a new email under the My Emails page!
FeedOtter Description
B2B companies and online publishers use FeedOtter to create email newsletters, and send automated blog messages from Marketo, Pardot and Eloqua. This results in less time, fewer errors and more website traffic. FeedOtter allows you to notify your blog subscribers about new content and send automated digest emails. With our perfect integrations, all emails are sent from Marketo, Pardot or Eloqua. Intelligent content analysis skips any sending if there isn’t new content. The adaptive scheduling feature supports hourly, daily and weekly sending patterns. Combine multiple RSS and data feeds in one email. Integration dependent: Conditionally hide/show content based upon users’ preferences. Do you send a weekly, daily, or other routine email newsletters? Do your newsletters contain content that your team copies and pastes from a website or are they full of it? FeedOtter can revolutionize your workflow.